The basic forms and reports that Access creates automatically make a good starting point for your database projects. It is, however, likely that you’ll want to improve them so they look better and are more functional. In this article I’ll show you how you can use Access Design View to add additional efficiency to forms and reports.
If you haven’t encountered Design View before, you might find working with it a little overwhelming. The best way to learn how to use it is to work with it. Make small changes and test the form or report to see the result. In time you’ll be able to make your forms and reports more functional and customized to your business needs.
If you’re worried that the changes you make might damage a form or report, make a copy and work on that. In the Access objects box, right-click the report or form to duplicate and click Copy. Now right-click in a blank area of the group, choose Paste and type a new name for the copy. Working on the copy lets you experiment with various options without fear of destroying the original.
Interactive Buttons
Microsoft Access comes with a collection of interactive buttons that you can add to your forms. The Find button, for example, is especially useful for locating a matching record in the currently selected field or the entire data file. To add this button to a form, start by opening your database in Access, select Forms in the Objects list, click on your form and click Design. This opens the form in Design View.
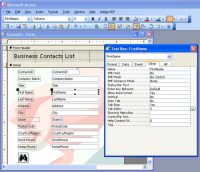
 When you move items around a form, be sure to adjust the tab index for each item. (Click for larger image). |
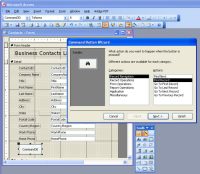
If the Design toolbox isn’t visible, you can display it by choosing View > Toolbars > Toolbox. Click the Control Wizards button at the top of the toolbox to select it, click the Command Button option in the Toolbox, and then click-and-drag a Command button onto an empty area of the form.
When the Command Button Wizard box appears, from the Category list select Record Navigation; from the Actions list select Find Record, and now click Next. When prompted to select either Text or Picture, select Picture and choose Binoculars 1, and then click Next. Type the phrase FindARecord as the button name and click Finish. A new button with an image on it appears on your form.
Test the new button by saving the form and then clicking Form View to see the form at work. To locate a record, click in a field such as State and click the new Find button. Type the State abbreviation and click Find Next repeatedly to move through your data file from one matching record to the next until you reach the end of the file. Click OKand then close the dialog.
Nice and Neat
In Design View you can also adjust the size of a field and its caption. To do this, switch to Design View and, for example, click the textbox for the State and reduce its size using its sizing handles. To change the caption, click in the label that contains the caption and type a replacement word describing that field. In Design View, the white textboxes are links to fields in the data file and the text captions are immediately to their left – it is the captions you will want to edit.
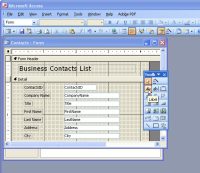
 When adding a header to the form, display the header area and add a label. (Click for larger image). |
You can also change the order of objects on the form by clicking the Select Objects tool. Click on an object to move and drag it into a new position using the small hand icon that appears over it. When you reorder objects you will probably also want to update the tab order so that, when you tab through the form, the cursor moves in a logical way.
To do this, right-click an object that needs its tab order changed and choose Properties > Other tab and locate the Tab Index property. The first item on a form should have its Tab Index set to 0, the second item should be set to one, then two, three and so on.
Leave the Properties dialog open as you click through the objects on the form in the desired tab order and make sure the tab index values are sequential. If they’re not, change the Tab Index value for the object to the correct value in the sequence and continue.
Add a Form Header
Forms have both headers and footers and the header is a handy place for the form title. To add a title, choose View > Form Header/Footer to view the header and footer areas.
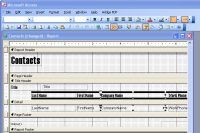
 A simple report fix involves resizing fields to better accommodate your data. (Click for larger image). |
Click the Label option in the toolbox then click-and-drag a label into the header area and type your text inside the label. With the label selected, click the Format tab in the Properties dialog and select an alternate Font Name and Font Size. If this doesn’t appear to work, make sure you have the correct label selected. To enlarge the header area, drag the divider between the header and the rest of the form downward to make a larger space for your title.
Add your Logo
You can also add your company logo or another image to the form. To do this, locate the Image button in the toolbox and click-and-drag a box on the form in which to store the image. When the Insert Picture box appears, select an image to use. To resize the image, right-click the image on the form and choose Properties > Format tab. Set the Size Mode to Zoom, set the Picture Alignment to Top Left and drag the sizing handles to adjust the image. To move the image behind the objects, select the image, and choose Format > Send to Back.
Reports have a similar set of tools that you can use to format your reports. Select the report you want, and open it in Design View. Things you can do to a report include adjusting the length of a field to accommodate the data it contains and perhaps moving fields to make additional room available.
When you do this, make sure you move both the field heading and the field itself so that the two line up neatly on the report. If necessary, switch backward and forward between Design View and Report View to check the progress of your changes.
Helen Bradley is a respected international journalist writing regularly for small business and computer publications in the USA, Canada, South Africa, UK and Australia. You can learn more about her at her Web site, HelenBradley.com
This article was first published on SmallBusinessComputing.com.


